
How to measure a bridge crossing
October 23, 2025
Why Accurate Measurements Matter
Incorrect bridge measurements can lead to:
> Inaccurate quotations
> unsuitable bridge designs
> installation delays
> additional site costs
Measuring the Bridge Span
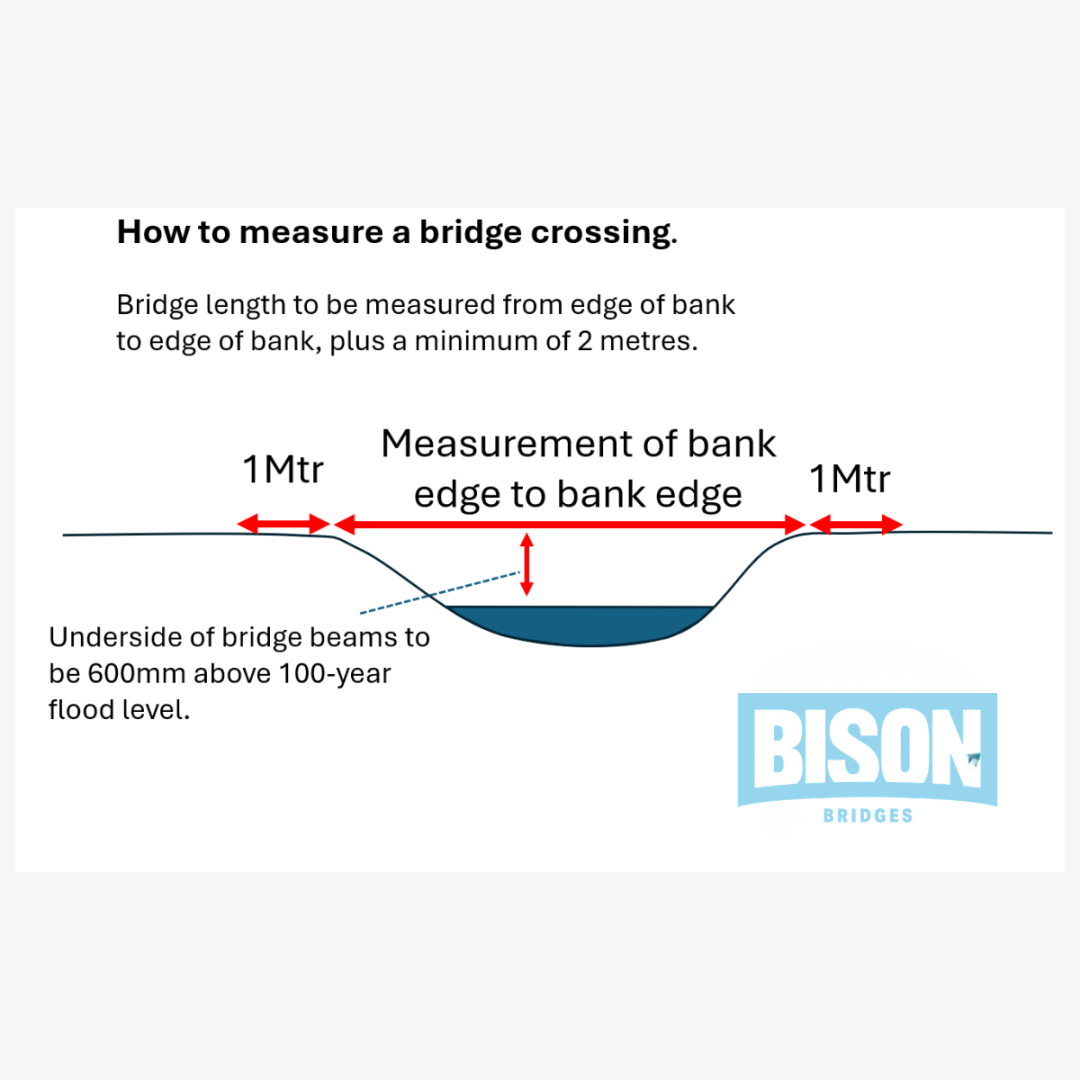
Measure the bridge length from the edge of one bank to the edge of the opposite bank, adding a minimum of 2 metres.
This allowance provides approximately 1 metre of bridge length beyond each bank edge.
As Bison bridges are stocked in 1-metre increments, selecting the next standard size up, for example an 8m bridge instead of a bespoke 7.8m unit, is often the most cost-effective option.
Other Important Measurements
Bridge Width
Consider:
- wheelchair access
- maintenance access
- future route usage
Bank Levels
Record any height difference between each side of the crossing, as this affects:
- accessibility
- gradients
- ramp requirements
- installation complexity
Watercourse Conditions
For river or stream crossings, assess:
- erosion
- Flood risk
- debris movement
A crossing that looks straightforward in summer can behave very differently during winter conditions.
Site Access Considerations
Before specifying a bridge, consider:
- vehicle access
- crane positioning
- restricted countryside access
- overhead obstructions
- ground conditions
Installation access is often one of the biggest overlooked challenges on rural bridge projects.
Site Photographs Help
Clear photographs can significantly improve quotation accuracy.
Useful images include:
- both bridge approaches
- upstream and downstream views
- surrounding terrain access routes
- existing structures
Including a tape measure or person in photographs also helps provide scale.
Our team at Built by Bison are always willing to help with your project; please call 01530 242 405 if you like help specifying your bridge.
Start Your Project Today
Quick to install, built to last and unbeatable in performance and value. Request a quote for bridges, boardwalks or any outdoor structure.